I have been so excited to do my first video tutorial and a little nervous too..lol. As well as the video I included a step by step tutorial in this post. You can watch the video first or read the tutorial first, it doesn't matter. Just make sure to read all the helpful hints I included at the bottom of this page :)
WHAT YOU WILL NEED:
- A medium sized cup that you wont mind getting dirty.
- Room temperature water
- -Toothpicks, an orange stick, a sharpened pencil. Anything pointy
- A base color, I used white for this but you can use any color you want
- Scotch tape to protect the skin around your nails.
- (Optional) Scissors to cut the tape of afterwards
- Nail polishes of your choice. I used 3 for this tutorial but you can use as many as you want
- Nail Polish Remover and Q-tips for clean up.
WATER MARBLE TUTORIAL
|  |
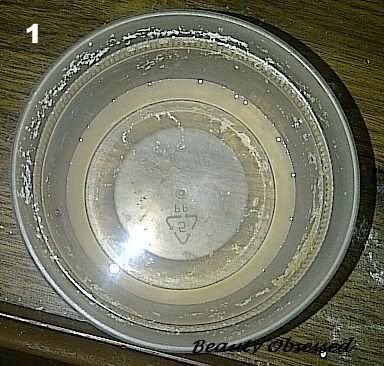
1. Start with a bowl of Room Temp Water
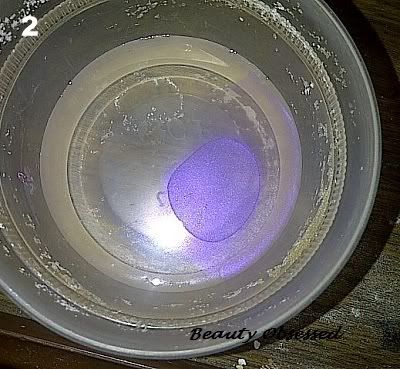
2. Add a drop of polish from a low height
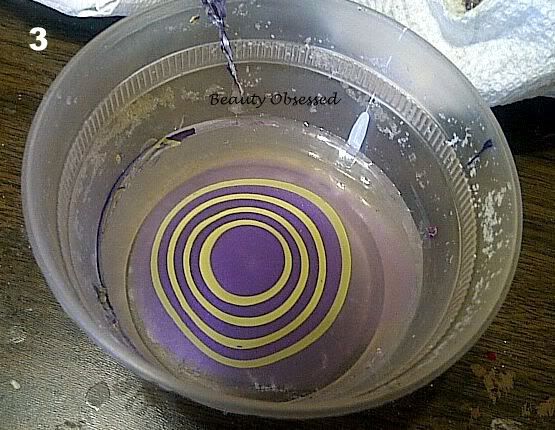 | 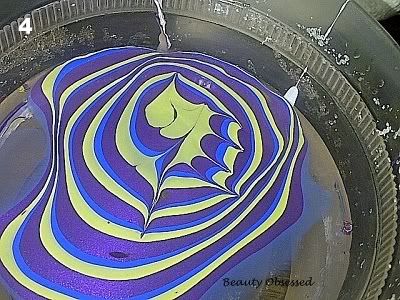 |
3. Keep adding drops, alternating colors.
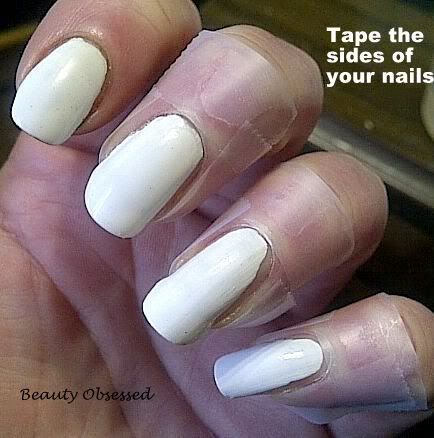
4. Pull lightly from the center using a toothpick, DON'T touch the outer edge bc it is already dry. Draw the design of your choice.
Then with your nail taped shown in the picture below, place your nail directly above the design you like and submerge it and don't remove your nail from the water until you pull all of the excess polish (in the bowl) by wrapping it around your toothpick.
(Sorry, it was hard for me to get a picture of that)
5. Then quickly remove your finger from the water and lightly blow on it to remove any droplets of water.
4. Pull lightly from the center using a toothpick, DON'T touch the outer edge bc it is already dry. Draw the design of your choice.
Then with your nail taped shown in the picture below, place your nail directly above the design you like and submerge it and don't remove your nail from the water until you pull all of the excess polish (in the bowl) by wrapping it around your toothpick.
(Sorry, it was hard for me to get a picture of that)
 |  |
5. Then quickly remove your finger from the water and lightly blow on it to remove any droplets of water.
6. Wait a few seconds and remove the tape. I find it easy to use a scissor to cut most of the tape off. Plus, if your other hand is already done you wont mess it up.
Let it dry for about 5 minutes and clean any nail residue with a Q-tip. Then apply top coat.
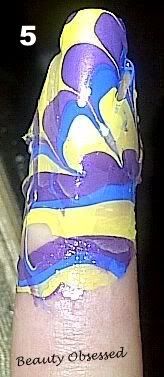
I used 3 colors for this tutorial:
- Sally Hansen's Xtreme Wear in Mellow Yellow
- Sally Hansen's Xtreme Wear in Pacific Blue
- Revlon's Colorstay in Amethyst
tips &
tricks:
- If your having trouble with the polish spreading out, make sure that the water is ROOM TEMPERATURE, and if you're still having problems try using bottled or filtered water
- Make sure your base color (I usually use white) but whatever color you choose, apply 2 coats & make sure it's smooth and not streaky. It will show through after you dip your finger.
- Most polishes will work, even glitter. But as you experiment you will find some colors/brands work better than others.
- Make sure to cover most of your finger with tape, otherwise half of your finger will be covered with polish. Plus, it makes it much easier to clean up.
- Always open the lids to your polishes before, you want to move quickly
- If you're polish isn't spreading out as much as you'd like, lightly tilt the cup.
- Wipe the polish off your toothpick between each (or every other) swirl to ensure clean lines
- If your doing all of your nails, do one nail at a time. I've tried doing 2 fingers at once to save time but it never came out well.
- Pull your finger straight out of the water (not on an angle) that can sometimes cause water bubbles. If that does happen, you can fix it by either trying to blow on your nail or covering it with some sort of nail gem or rhinestone.
- Don't drop the polish too high from the water or it will fall to the bottom of the bowl.
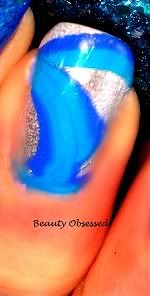
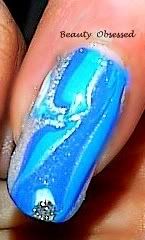
My very first attempt at water marbling
 |  |
Like I mentioned before this was my first ever video tutorial so I hope you enjoyed it and the step by step tutorial, even if you are not interested in water marbling.
I would really appreciate your honest feedback on the video, being it my first time and all I need to know what you thought.Don't worry I can take constructive criticism lol :)
Click the links below :)



Good job!! Like the video even if we did miss the tape removal lol
ReplyDeleteThis looks absolutely amazing!
ReplyDeletexx
These look amazing, seem abit too tricky for me though!
ReplyDeletehttp://zozeze.blogspot.com/ x
Looks super cool but very intimidating! :)
ReplyDeletegood tutorial kelly:) the only thing i could suggest is that you make is a tiny bit shorter:) i think over 10 mins is just a really long time for a tutorial- maybe its because i get so antsy! haha. maybe to make it shorter you could have only showed the first couple of dots you made in the water- not the whole thing because that took at least 2 or 3 mins.
ReplyDeleteagain, loved the video and just a little tip for ya- no big mistakes at all like my first videos.... haha
Great tutorial! You nails look amazing!!
ReplyDeleteJayme & Mendi @ Her Late Night Cravings
Wow this is so awesome, thanks a lot for showing this post! I've never tried this technique before but it looks very pretty!
ReplyDeletelol. Thanks!!!!!
ReplyDeleteThank you!!! :))
ReplyDeleteThanks :) That's what I thought at first & it kinda is but once you get the hang of it, its not so bad :)
ReplyDeleteI was super intimidated when I first saw it, It took me a while to get right
ReplyDeleteThanks hun!!
ReplyDeleteI agree, I didn't even think YouTube let you post videos over 10 min unless you were a partner or something. My plan was to fast forward through the nail polish dropping part, bc I've seen it done on other videos but I couldn't figure out how to do it. Oh well, thanks for the feedback.
xoxo
Thanks girls!!!
ReplyDeletexoxo
I did it myself today! SO proud of myself lol! Check it out:
ReplyDeletehttp://mykarmakisses.blogspot.com/2012/02/hooray-for-me.html
Great job, Kelly!!! Makes me wanna go do it again;)
ReplyDeleteKelly this is awesome girl. I will definitely try this week.
ReplyDeleteLove water marbling, it's so much fun :)
ReplyDeleteI did your nail polish tag and here's the link if you'd like to have a look :) http://ms-jelena.blogspot.com.au/2012/02/nail-polish-tag.html
xx
your welcome:)
ReplyDeleteI gave you the one lovely blog award! check out my post to see details:)
www.seventhingsbeauty.blogspot.com
Lovely Post!
ReplyDeleteCheck out my unwanted beauty box post! Leave a comment you visited!
xoxo,
nataliece.blogspot.com
Sally Hanson are the best for water marbling. If you dont have scotch tape try some vaseline as you can get his right up to the nail bed and once the polish has dried it peels right off! This was great and I am so glad you finally got round to doing it I know you had said before you were a bit wary! :) x
ReplyDeleteIm so proud of you too!!! They came out so good! Better than mine, I love the Valentine's Day ones. I can't believe this was your first time doing it too!! That means your a water marble pro! You're gonna have to teach me a few things on it now. lol. Seriously! The part I always have the most trouble with is drawing the design.
ReplyDeleteThank you for mentioning me in your post, that was so sweet!! xoxo
Thank you!!!
ReplyDeleteYayy!! I cant wait to see them! Thank you :)
ReplyDeleteI just read it & left a comment. Thank for reading!!!
ReplyDeletexoxo
LOL thanks! Sure, maybe I'll do a tutorial ;-)
ReplyDeleteYea, I noticed that Sally Hansen works well. I heard about using vaseline or chapstick too, Im gonna try that next time.
ReplyDeleteThank you so much! Im glad you like it :)
You should!!!
ReplyDeleteI'm not brave enough to try this... But maybe someday I will!
ReplyDeleteThat's how I felt at first, it just takes practice.
ReplyDeleteWe have very different techniques. You use a lot more polish than I do and I've found using water from a filtered kettle (after it's cooled and is lukewarm) is much better - but that might just be a cold UK thing.
ReplyDeleteWe don't have Sally Hensen here (not readily available) but I've found that OPI is brilliant for this.
Did you draw black outlines on them? The picture looks like there's a fourth colour.
I might try to do a tutorial video for it. My marbling post was too wordy I think http://thoughtsinlittleboxes.com/2011/12/20/festive-water-marbling-nail-art-featuring-opi-models-own-barry-m-and-andrea-fulerton/
These look amazing! really must try marble effects myself. tho dont think mines would try out anywhere near as good as yours! x
ReplyDeleteThank you!!! You should really try it, it took me lots of tries to get it right so practice helps. I still have a difficult time doing it. It all depends on the nail polish and the water tempature.
DeleteThanks for reading!!
Kelly
xoxo