Showing posts with label wet n wild. Show all posts

3/17/2013

St.Patricks Day Water Marble Nails!

I always say holidays are a great excuse to do nail art, even if it's not your favorite holiday. I should have posted this earlier but the truth is I didn't do them until yesterday. I'm not sure what made me decide on a water marble design considering I've only been successful at it a few times. I was hoping I could get a four leaf clover design but I was just happy that they came out good.


I used Permission to Proceed by Wet n Wild's Spoiled line for my base. Weird name, right?  It's a sheer medium green and the formula is pretty bad, it goes on very streaky. For the water marble I used Going Green and Mint Sorbet by Sally Hansen Xtreme Wear, a regular green and a pastel green. Do you do anything special on St. Patricks Day?

Happy St. Patricks Day!!

Click the links below :)
Photobucket

3/09/2013

Acid Wash Nails! Tutorial

Hey Everyone! I wanted to try Acid Washed nails for the first time. I've seen this look before and liked it but totally forgot about it until now. I like how it came out and its super easy!  As I was doing them I decided to do a step by step tutorial with picutres, and then I decided to record the last step since it's easier to show you then put into words. Here's how my nails came out, for the colors I used: Midnight Blue by Sinful Colors and French White by Wet n Wild.


acidwashnailart.jpg


Here is a little step by step tutorial with a short video to help you with the 3rd step. 


What you will need:
- Blue nail polish
- White nail polish
- Nail Polish Remover (preferably acetone)
- A bunch of Q-Tips
- Top Coat

  
Apply 2 coats of a blue polish then a top coat. Let them fully dry.


Once the blue polish is dry, apply a coat of white polish directly over the blue and again let fully dry!


**Watch the quick video I made below to see exactly how I do this**

Saturate a Q-tip in nail polish remover and start to rub the nail in a downwards motion using light pressure. Then add some top coat and your done!
  

Quick Video on How to get the Acid Wash Affect!


TIPS & TRICKS:
  • You will probably need 2 Q-Tips a nail since your picking up a lot of white polish
  • Make sure the Q-Tip is saturated in the nail polish remover. This will help it go by faster.  
  • Don't rub too much in one spot because you don't want to pick up too much of the blue polish.
  • Use light pressure when using the Q-Tip, or you can end up with a bumpy nail like I did.
  • Be patient with this manicure, let the blue polish and white polish dry completely.
  • Be careful that your Q-Tip doesn't get bits of cotton on your nails, that's why it's best to use a few Q-Tips each nail. 
  • If your nails still feel tacky because of the 3 coats of nail polish, dip them in ice cold water before you go in with the Q-Tip. That should take any stickiness away.
  • You don't have to use the standard blue and white colors, you can be creative and use any colors you want!


I hope you liked this tutorial! I had fun making it!  Let me know what you think :)


Click the links below :)

Photobucket

1/30/2013

Five Favorites: January 2013

It's the end of the month (already) so that means time to pick out my 5 most used and favorite products of the month. I always like writing these posts even though it sometimes can be challenging to pick only 5 products. However, if I didn't give myself a limit I would probably end up with too many. Yea, so that's why I always do just 5, if anyone was wondering :)

Wet n Wild Ultimate Brow Kit


This is the only brow kit I will use on my eyebrows. I have medium brown brows, so the middle shade is perfect. The bottom shade is obviously too dark, so sometimes I will use it as an eyeliner.  I like the wax because it keeps my brows in place while giving them that neat put together look. This kit comes with a small brush, tweezers and a mirror that slides out. I don't use the brush or tweezers only because I have my own set I really like. With Wet n Wild being amazing as they are, this only costs $3 or $4!  I ran out of it about 6 months ago and really thought they stopped making it. Then I saw it in Rite Aid and almost had a heart attack I was so happy. I bought 2 of them!


Too Faced Tinted Beauty Balm 

I've only used one other BB cream and that was Garnier's BB cream. I bought that one last year and fell in love with it and have been using it ever since. I recently got to try a sample of the Too Faced BB cream and really liked this one too.  I decided to buy it, plus I've almost used up my Garnier tube. It comes in just 4 different shades which might be an issue for some depending on your skin tone. Thankfully Nude Glow was perfect for me. I like this because it gives you some coverage (but it's not too heavy) just like the Garnier one. It really does a great job at evening out my skin and covering any redness. I honestly feel 100% comfortable with just this on my face if I didn't feel like wearing a lot of makeup. Another great point- it doesn't have too many harmful ingredients and has SPF 20. It is a little pricey, $34 at Ulta, but it was a small splurge that was worth it.


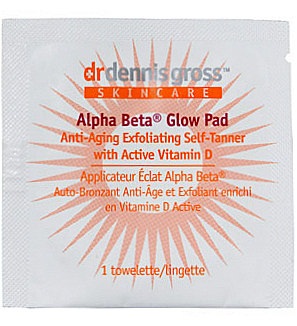
Dr. Dennis Gross Alpha Beta Glow Pads


I have yet to find a self tanner for my face that is streak free, not orangy or doesn't dry my face out, until now. I've never heard of Dr. Dennis Gross skincare until I saw YouTube guru emilynoel83 mention these. I  found them at Sephora and ordered the 20 pack for $32. They also have a 50 pack for $65. These self tanning towelettes are just for your face, but they also make ones for you body. They give you a nice even natural glow. What is even more great is that these towelettes are helping your skin at the same time. They have active Vitamin D and anti aging antioxidants. I use them at night before bed since it takes about 3 hours for the color to develop. My only wish was that the color lasted longer than 3 or 4 days. They are also sold on the Dr. Dennis Gross website.


Rimmel Scandal Eyes SHOW OFF Mascara

I've only tried 5,000 mascaras in my life and liked about 10..(lol- exaggerating but you get the idea). So what's not one more to try out. That's what I was thinking to myself when I randomly picked this up at CVS a few weeks ago. I really think my expectations for mascara are too high and I need to lower them.  Anyway this mascara did not disappoint! I was impressed with the volume and length it gave my lashes without clumps or any mess. If you look at the wand (on the left) the flat part of the brush plumps the lashes and the ball at the tip lifts and defines. When applying mascara I rarely apply a second coat just because it always seems to clump up. When I tried a second coat with this mascara I had no clumps!  I'm so glad I tried this mascara because it's one of my favorites now. This was around $7 at CVS and I've also seen them at other drugstores.


Britney Spears Fantasy

I've always been a fan of Britney Spears fragrances, I used to own her other fragrance, Curious so when I smelled Fantasy I really liked it. There are so many perfumes out there I like, but these always have an elegant, girly, sweet kind of smell. It's perfect for during the day or at night and you only need 1 or 2 spritz and it really does last a while. It's funny because I've been wearing this all month, so whenever I walk into work they know I'm there without seeing me. This was a Christmas present but I'm almost positive I saw it at TJ Maxx for around $30


Do you use any of these products??

Click the links below :)
Photobucket

5/18/2012

A Years Challenge Week 20: Bow Mani

This week's challenge was to come up with a manicure with bows. Even though I'm not a fan of stamping because I really suck at it, I was hoping I had bow on one of my plates but I didn't. I was actually going to give stamping a fourth try lol.

The look I did for this week is known as the tuxedo mani. I've been wanting to try this  ever since I saw it a while ago and since it requires bow ties I figured it would be the  best time to finally try it.

3/06/2012

A Years Challenge Week 9: Polka Dot Mani

Yeahhh!!!! for this week's challenge, polka dots! I love polka dots and since the last two weeks for this challenge didn't come out like I would have wanted, I was excited about this week.  I haven't done a polka dot mani for a while but I think it's one of the first nail designs I mastered. It's not hard to do either and you don't necessarily need dotting tools to do this. I used to use either bobby pins, toothpicks, basically anything that had a rounded end.

This was a perfect opportunity to get some real use out of the 5 pc dotting tool set Born Pretty Store sent me a few months ago. I used the 2 largest sizes for the dots and one of the smallest sides for the white dots on my accent nail.

12/12/2011

MY FAV NAIL COLORS OF THE SEASON + SWATCHES

This post is going to feature some of my favorite nail colors I've collected this season along with swatches. If you read my blog you might know that I'm really into nail polish, I always have been but my obsession has gotten worse over the year.  I used a nail wheel to swatch each color so you can hopefully see what it looks like outside of the bottle. As you can see I marked each color with a number right above and that corresponds to the descriptions below. I wanted to narrow it down to just 10 colors but I couldn't do it, narrowing it down to 13 was even hard. I hope you enjoy this post :)


12/05/2011

NOTD: Red Carpet Christmas!

Hello Dolls!
I hope everyone had a great weekend! This weekend we put up the Christmas tree and decorated the house. That always puts me in the holiday spirit. I’ve been excited to do a few festive theme manis throughout the month and today's nails are decked out in red, green and gold. I began with my usual basecoat, Sally Hansen's Complete Care 4 in 1 treatment. Then I used 2 coats of Sally Hansen's Xtreme Wear's Red Carpet. Red Carpet is a pretty jelly based deep red with very fine glitter. The formula applied very smoothly and was completely opaque with just 2 thin coats.  I really love this color, its almost like a ruby red because of the light glitter. Then I applied a thin coat of Sally Hansen's Insta-Dri Anti Chip Top Coat. 

11/29/2011

Sally Hansen HD in Laser NOTD & Review

Hey Dolls!!

So today's NOTD is also going to be a review on Sally Hansen's HD Hi- Definition line since this is the first time I've ever used it. I know this line came out sometime this past spring so I'm surprised that I haven't used it yet. The color Laser, is  a pretty medium to dark blue with flashes of pink and purple shimmer. It stuck out like a sore thumb at the store.It looks so amazing in the bottle, hopefully you can see the stripe of purple showing in this pic.


11/07/2011

NOTD: SPARKLE + BLACK = GORGEOUS!

I usually only paint my nails once a week, I feel like if I was to paint them more than that it wouldn't be good for my nails,  but if you saw my last NOTW post with the Snow Me White and Rock Star Pink glitter added you know that I was not happy with the results at all. So I made an exception and took it off today and tried something different. 


9/30/2011

Five Favorites: September 2011

I cant believe its time for me to do another monthly favorites post, I feel like I just did August's. Time does fly, way too fast sometimes. This month, as far as beauty products was pretty simple for me. I don't feel like I used anything to fancy that much. I pretty much kept it simple, I find that I tend do this a lot in the summer months bc of the heat. Most of these products are ones I've had that I started using more this month. Hope you enjoy and please leave a comment :))

Aussie 3 Minute Miracle Moisture Treatment

Whenever I use this 3 minute miracle treatment my hair feels totally different. I've yet to find a regular conditioner that does what this does. I don't use it everyday, I probably would if I didn't have to wait 3 minutes to rinse it out. I know, I'm very impatient. I also found if I leave it in my hair for about 5 minutes the results are better. It's made for dry or damaged hair and its a simple solution to soft manageable hair. When I use this I can tell as soon as I start rinsing it out that my hair feels great. I have less tangles when getting out of the shower, I have an easier time blow drying and styling and I don't feel like I need to use as much, or if any kind of anti-frizz serum. One of the best things about this product is that its super affordable. This is my second bottle and I've never paid more than $3.99. The packaging makes it easy to get every last drop out of the bottle. I highly recommend this to anyone that deals with dry/coarse or frizzy hair. You can find it any local drugstore. 

e.l.f Studio Contouring Blush & Bronzer Duo

This is another great bargain, this cheap duo has gotten a lot of use from me all summer long. When I first opened it I didn't think I was going to like it because it lhas a shimmery look.  But once you put   it on you dont notice the shimmer. A lot of people have compared this to NARS Orgasam/Lugana Duo, I recently saw a YT video comparing the two and its not that similar but I like the elf duo better. I dont contour my cheeks everyday but when I do the bronzer works great for this and its buildable.  As far as the blush, I use it on top of my Milani Mineral Blush in Sunset bc its a peachy color. So when I mix it with a little bit of elf's blush it gives the peachy color a glowy light pink tint. The packaging on the other hand would be great if the mirror inside didn't fall off. But who knows, I could have dropped it a few times. I've never used the mirror anyway so it doesnt bother me. This was only $3 at Target! I know, only $3! If your local Target sells elf products you'll probably find it there or you can order it from the elf website.

                                    Rimmel's Fix & Perfect Primer

This is my favorite drug store primer because its not like the rest of the primers out there. It doesn't have that silky gooey feeling like the rest of the primers do. When I first tried it I got a little nervous bc it's not clear,its peach but when applied it blends right in and there's no traces of peach. Not only does this primer help my foundation stay on for a long time it also really evens out my skin tone. I know a lot of other primers promise to do the same but this is the only one that has delivered. On a good skin day, I've been able to leave the house with just the primer and a little blush or bronzer. It makes my foundation go on a lot more evenly too. I think I should go stock up on this in case it gets discontinued! On another good note it was only $7.99 and thats pretty good for me compared to the $50 I used to spend on Smashbox's primer. I've seen this at local drugstores (anywhere that sells Rimmel products)


Wet n Wild Coloricon in Lust 

I've been a huge fan of their new color icon palettes. I think I almost have every one. I'm missing a few but I'll defenitly get them. I'm so impressed with this new line. The colors are all so rich and pigmented and they last on my eyes for hours without that annoying crease you get with some other eye shadows. One of my recent  favs that I've been using more this month is called Lust. It has 6 different colors, 3 are matte and 3 are shimmery. The colors range from a light pale pink to a dark highly pigmented purple. You can make a very pretty purple smokey eye or an everyday pretty purple look. Some days when I dont have the time or dont  feel like doing a full eye makeup look, I will just use the pale pink or pale nude colors all over my entire eye lid and Im good to go. I love how you can get so many different looks with the colors in there palettes including this one. If you haven't tried these new palettes you really need to, take my word for it. I've read a lot of reviews that say they compare these to MAC's eyeshadows and I totally agree, except these are a whole lot cheaper. You cant go wrong. They have a trio palette's for $2.99, the 6 color palette's are $3.99 and the 8 colored ones are $5.99. You can find these at drugstores where Wet n Wild products are sold.  

L'OREAL HIP High Intensity Pigments in Progressive
This is actually a random eye shadow or pigment that I picked up over a year ago at CVS bc it was 50% off.  I forgot I had it until a few weeks ago when I came across it in one of my draws. It's so tiny its easy to look over.
I use this as an eye liner usually on my lower lid. It's a rich dark bronze color as you can see in the pics and  they call it Progressive for some reason. I either use it alone or over a brown eye liner. It really makes your eyes pop, especially for blue eyes.  I use a slanted eye liner brush to apply this. You just have to be careful because the fall out could be a little messy and I have to be careful not to get one of the tiny  particles in my eye. ( Its happened and its annoying lol). Before I apply it I make sure that the color is packed on to the brush well to prevent fall out. Im not sure if they sell them anymore, they might. I haven t actually looked for them. They had a few other colors, I think a pretty blue, a silver, pink and a few others. This is another product that can last you forever because you only need  a tiny bit. Too much wont look right .I wish I could remember how much it was. Sorry. If anybody's seen these or owns them, let me know! 


   So these are my five favorite products Ive been using over this month. If you have used any of these products leave me a comment and let me know how you like them. 


Please click on these links :)


8/05/2011

NOTD: CracKle -iN

I just recently (like a month ago) heard of this new “Crackle nail polish” The pictures I’ve seen with the Crackle polish looked really cool so I knew I had to try it. I went to Walgreens yesterday for something different and came across them. Then I saw that they only had two colors left, a red color and silver color. I bought the silver one that’s actually called “Fractured Foil”. I figured it would work over black nail polish.

So here I am, home about to give myself a DIY manicure with black nail polish and the Fractured Foil Crackle.  (I know, not very summerish), its okay bc I really want to try it out. I will post my results when I'm done for you guys to see.


So I finished my manicure and I really like the way it came out. I like how you can apply a thin or thick coat for different results, I applied more of a thin coat, I wasn’t sure what it was going to look like so I figured less the better. It also dries pretty quick too. I'm excited to try the different colors they have, looks like I have a new obsession of the week  


6/14/2011

Five Favorites: May 2011

May’s favorites were hard for me to pick out. I went back and forth between a few products deciding which ones I liked more. They’re all inexpensive drug store products (got to love beauty bargains)! So I guess you can say May, for me was a good month for beauty finds.
     Sauvé's Volumizing Root Boost Spray
My haircut is a lot of short layers on the top so I’m always looking for root boosting or volumizing hair products for when I blow dry my hair to give it some extra oomph. Sauvé recently came out with a new line of professional proven hair products that guarantee to work as well as salon products. I honestly wasn’t expecting much but I was wrong. I already have some volume naturally bc of my short layers but when using this product I definitely saw results. I spray my roots by parting 1 to 2 inch sections and then continue to mist evenly through my roots and the mid shaft of my hair. I also use a big round brush concentrating on the crown.
                         

Wet n Wild Color Icon 8 pan Eye shadow Palettes – in Comfort Zone 
When I think of Wet n Wild it brings back memories from when I first started experimenting with make up. I remember buying there $1 eyeliners and nail polishes. They weren’t the best quality but being a young teen it was what I could afford and honestly didn’t know too much about the difference in the quality of makeup. I never thought that I would be comparing their eye shadow to some of the most expensive brands of makeup, but I am and I'm so glad! Wet n Wild recently came out with a new 2011 line with a brand new assortment of eye shadow palettes and they are incredibly pigmented and rich in color. Not to mention how smooth they go on and how long the color lasts. I’m totally in love with all of them. I believe they have a total of 6 different palette’s in trios and 3 different 8-pan palettes. I’m going to show you one of my favs, its one of the 8 color sets. This one is called Comfort Zone and it has 2 brow bone, 2 eyelid, 2 crease, and 2 definer shades and their all labeled to give you the direction you need to create a gorgeous effect. I highly recommend these, if you haven’t tried them yet, well you really should. I know you’ll be impressed.


        Body Bling by Scott Barnes
So I'm not going to lie, I use to be somewhat of a tanaholic, tanning beds and laying out the sun whenever I could. I know it was horrible for my skin. As I’ve gotten older I’m more aware of how bad the sun is for you. I’ve tried so many different self-tanners, even tried the spray tan at the salons. I never was really impressed with any of them. They either made me look orange or had no effect or they were streaky. Then I found Body Bling by Scott Barnes, a celebrated make up artist within the cosmetic industry. He has worked with world-renowned photographers with his work gracing the covers of magazines such as Allure, Harper’s Bazaar, In Style, Vanity Fair and much more. Scott has also worked with a variety of celebrates such as: Beyoncé, Kate Hudson, Gwyneth Patrol and more.  Body Bling is the only self tanner I will use. Its easy to use tube ensures a flawless application. You basically just apply it like you would a moisturizer, (of course rubbing it in more thoroughly) I've never experienced any streaks. . I have been using it on my legs when I wear capris and I love how it looks like you just got back from a tropical vacation. I use the original Body Bling that comes in a 1oz tube. It looks small but you only need a tiny bit and I’ve had mine for months.
           

Got2b Rocking It Dry Shampoo
I’ve always loved most of Got2b’s hair products. So when they recently came out with their dry shampoo I had to try it. Especially since I don’t wash my hair everyday, so on the 2nd (or sometimes 3rd day) this come in handy. You just shake it very well, spray it about 8 inches away from roots, rub it into scalp then brush it out. TIP: After applying the dry shampoo blow dry your roots with a round brush. The mix of the  dry shampoo and the natural oils will make for a great volumizer, so you'll  get an extra day out of your blow-out and major volume
      
e.l.f Eye shadow Brush 
When I say this is a favorite brush among the high end Big Name ones in my collection I'm not kidding! It's the same shape and does everything the MAC –239 brush does but in my opinion the bristles are softer. The store Target near me finally started selling a full line of e.l.f products. The first time I came across it I was so excited (especially bc the highest price item was $5)! So I went a little crazy and bought about 15 items. I couldn’t resist (being the beauty addict that I am). I was so surprised the first time I used this brush, it’s especially great for picking up pigments and even for the crease of the eye. The one negative thing I could say about this (and it really doesn’t matter to me since it was only a $1) but they don’t clean as well as my other brushes do. For some reason the eye shadow doesn’t come off as easy. I would still prefer this brush over some of the higher priced ones. Can we say BEAUTY BARGAIN!!!
        

Related Posts Plugin for WordPress, Blogger...