6/28/2011

DIY Lemon Facial Scrub

                    I am so into DIY beauty recipes. I love the idea of going into your kitchen and cooking up a facial scrub or hair mask for very little cost.    


I plan on posting a lot of different DIY treatments for all sorts of things. I just want you guys to know I would never post a DIY recipe that I haven’t tried on myself. Please share any of your own DIY secrets and please comment. xOxO!

This is one of my favorite facial scrubs. I actually got the idea from Kandee Johnson, for you guys that aren’t familiar with her she’s a well known YouTube guru and a well known makeup artist. Check out her YouTube channel at: http://www.youtube.com/user/kandeejohnson

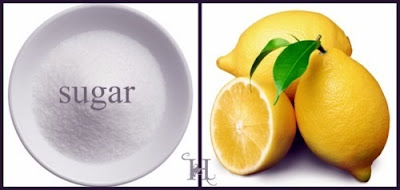
WHY IS THIS SO EFFECTIVE?  This is great for removing dead skin. The lemon works with helping acne, blackheads, brown spots/discoloration from the sun. The sugar is a wonderful exfoliator while smoothing the skin. It makes your skin feel so soft afterwards and its almost like having a mini face peel because it sloughs off the top layer of your skin. Trust me, you guys will love it!!


THINGS YOU WILL NEED:


  • One lemon or organic lemon juice (either one is fine, just try and make sure the lemon juice is organic. You want to avoid putting any chemicals or ingredients on your face) 

  • Granulated Sugar 

  • A few cotton balls or cotton pads

Step 1: You want to start off with clean skin (at least make sure you don’t have any makeup on). Splash your face with warm water to open the pores.

Step 2: If your using a lemon squeeze the juice out of the lemon into a small bowl or dish. If using the lemon juice take one of your cotton balls or pads and saturate it with the lemon juice. Then sprinkle about a teaspoon of sugar onto your cotton ball (actually you can even use a washcloth if you prefer).

Step 3. Start scrubbing and buffing your face in circular motions. Try and concentrate on the areas that have the most problems like your T-Zone or any other areas that you feel need the most help. Keep buffing all around your face, make sure you get up where the hairline is (especially if you don’t wash your face everyday).

Step 4: Rinse your face off like you normally would, if you happen to get any in your mouth don’t worry it taste just like lemonade


-If your face feels like its stinging or it causes any irritation you can dilute the lemon juice with water.

6/27/2011

The Easy Steps It Takes To Blow Dry Like A Pro


After years and years of trying to blow dry my hair like my hair stylist would, I finally learned and I actually don’t hate blow drying it anymore bc I’m happy with the results. It took lots of practice to get the techniques you need to get a great blow out down. But I promise you once you understand them and are using the correct products and tools, you to will be able to get salon like results.

I’m sure there's a lot of you that already are satisfied with the results you get but for those of you that are still struggling or want to get some extra pointers, I decided to dedicate this post solely on how to blow dry your hair to get professional results. I hope you guys enjoy and please feel free to comment or add any tips you have. xoxo!

I absolutely believe that one of the main tools that will make a difference is the blow dryer your using. With blow dryers the price is really right. They can range anywhere from $10 to some that are over $100 (those most expensive are the professional ones that salons use). It all really depends on what your personnel needs are: (i.e heat settings, attachments, wattage, etc.)  If you have short hair or don’t use a blow dryer very often, then an inexpensive dryer with fewer options will likely work for you.  When you get into the $50+ range, you are investing in a dryer that will last longer, use newer drying technologies to reduce damage on your hair, and contain more options for cater to your hair needs.  While the more expensive, salon-quality models do tend to have all the bells and whistles, you can get a good, well-equipped dryer with great features for around $40 or $60. You want an ionic blow dryer with at least 1800 watts (will reduce the drying time and are less damaging to your hair), make sure it has variable heat setting with a cool button (that button is important). It should come with a diffuser and a nozzle for smoothing the hair.

Now that I got that out of the way lets get started! After you wash your hair instead of using your regular towel try paper towels.  Take 3 or 4 sheets and wrap around your hair to get out excess wetness. If the paper towels come away soaked, do it again. Then let it air-dry as long as possible, or wrap it in an absorbent towel, such as an Aquis Hair Towel ($18, amazon.com), to remove excess water. You don’t want to start blow drying your hair until its about 70% dry and don’t bother putting in your hair products yet either, hair really wet wont take in the styling products like you want them to.

I will start pre-drying my hair with the blow dryer on a medium heat setting and massage your roots while doing this. I wouldn’t do this for more than 10 minutes, the thicker your hair is the longer you’ll want to pre dry and vise versa for thinner hair. You always want to get your roots dried first so with your fingers lift your hair away from your roots while directing the blow dryer at the roots.

Once your hair is almost dry apply your products. I have normal to dry hair so I use a leave in conditioner right after getting out of the shower. Then when its almost dry I use Paul Mitchell’s Skinny Serum ,It helps smooth out the hairs and cuts down on drying time. The trick is to make sure you coat every strand, besides the crown because that will weigh the hair down. I flip my head over, use a dime size amount in my palms, rub your palms together and start at the ends and work your way up to the mid shaft. Then comb through your hair to evenly distribute. For volume I use SauvĂ©'s Professional Root Boosting Spray, spray the roots by parting hair into 1-2 sections and continue to mist evenly through roots and mid shaft. Everyone has a different hair type so you’ll probably have to experiment with a few different products before you find the right ones for your hair. Once you do find the right mixture, it will make your life a lot easier. Smile 

I have thick hair so I like to part my hair into a lot of different sections. Like the diagram on the right shows. But if your lucky to not have as much hair as I do,  you can just do three sections, from the top, the middle and the nape.( on the diagram that would be numbers 1, 4 and 6). Leave the nape section loose because this is where you'll begin blow-drying. You might have been told to start blow drying your bangs and front section first and if it works for you go with it, but I personally have tried it both ways and prefer doing the front section last, my reason is bc I feel it’s easier to start at the bottom and work your way up because when you drop the hair down, you aren’t putting dry hair on top of wet. It’s also easier because you can see what you are doing more easily. (just my personnel preference).

As far as brushes, if you want a very straight look you can use a paddle brush but if you want a straight look with some volume use a big round brush (my favorite brush). It can be tricky to use at first but once you get it down it’s a no brainer. I used to hate using these brushes bc I didn’t know the correct way to use them but now that I do I love them. To use the round brush, take a section of hair that is about the same width as the brush. Place the hair over and around the brush. Apply the dryer and rotate the brush as you dry. The bristles work to smooth each hair as they rotate. If this seems to be too  complicated, leave out the rotation of the brush. Always point the nozzle attachment on your dryer facing down the hair shaft. This helps to flatten the cuticle for the sleekest results. Once your done with the bottom half, unclip the middle section.

You want to achieve some volume in this section.  I do that by placing the brush right under the section of hair, and then bringing the brush up. Direct the dryer flow against the hair as you lift to lock in volume, then smooth through the rest of the strand as usual.

Extra Tips: Remember when your section is dry, use the cold shot button on your hair dryer for a few seconds to set the shape

                 As you dry, turn and move the brush toward the ends of your hair.

When your done with the middle section unclip the top and you'll want to dry your bangs in a desired style, depending on the length and cut of your bangs. Typically bangs respond better when dried forward, but you will have to experiment to see what works best for your hairstyle. For me, I like to spend the most time on this section bc I want to achieve volume while framing the layers around my face.  I do that using my large round brush and blow drying the hair forward and up while over directing the hair. This creates a great deal of volume and body especially when used with a volumizing mouse or spray.

Before you put away the blow dryer, feel with your hands that you haven’t missed any areas that are damp. You might want to go over you bangs again with either the blow dyer or a flat iron to achieve your desired style. After your hair is dry to the touch, give it a blast of cool air to set the style in place. Finally, massage a pea-size amount of smoothing serum (or styling cream) into the ends to flatten fly aways, and pat the top of your head with your hands so that any residual serum will level shorter, broken hairs that tend to stand up around the crown.

So that’s it, I hope this was somewhat helpful and not confusing. Let me know loves xoxo

6/25/2011

How to Wash Your Hair Properly


Washing your Hair can seem like a no brainer to must of us, but that’s not necessarily true. A lot of us are probably doing it wrong. I certainly was, I was guilty of using too much shampoo which caused it to become dry and flaky and I never understood why. Not to mention rinsing out all of that shampoo out could be a real pain.

But now that I know better I only use a small amount of shampoo and my hair feels and looks a lot better, plus I’m saving money by not going through bottles of shampoo so quickly.
So even though I'm sure most of you know how to wash your hair properly. I thought I would put together this little guide for those of you that aren’t sure if your doing it right
Step 1: Wet your scalp with lukewarm water and also make sure all of  your hair is soaking wet before applying shampoo (the wetter the hair the better the shampoo will work)
Step 2: Apply a small amount of shampoo (about a quarter size) into your palm, then rub your palms together and distribute it evenly through your hair.
Step 3: Rub the shampoo with your fingertips (not your nails) and massage gently onto scalp. Rinse it off completely while working your fingers through your hair while doing so
Step 4: If you have very oily hair or have a lot of product build up, you can either repeat steps 2 and 3 or make sure you use a clarifying shampoo. (clarifying shampoos are great when you had a lot of hairspray or any styling products in your hair). They get rid of all that build up, I use a clarifying shampoo once every 4 shampoo’s.
Step 5: Shampoo can tend to strip your hair of moisture so using a conditioner is essential. I have normal to dry hair so I use hydrating and moisturizing creamy conditioners. Pour some on your palm (about the same amount you used with the shampoo). If you have more hair: thick or coarse you might find that you need more than a quarter size amount of conditioner. If your hair tends to be on the thin side or is short you will probably use less. Use your judgment. I like to rub my hands together then starting at the ends of my hair work the conditioner up into the midshaft while taking a minute to really work it into my hair. Then whatever conditioner is left on my hands I will run through the top half (my roots). I try not to use too much on my roots bc that’s where I want the most volume and using too much can weigh it down.
Step 6: Even though they tell you to let the conditioner sit for several minutes its really not that necessary. Just working it into your hair takes a few minutes. So what I do (and I’m not telling you that you have to do this) is finish up whatever I have to do in the shower after I’ve applied the conditioner then rinse it out well. Then do a final rinse with cold water, the cold water helps close the cuticles which can help the sebaceous glands produce less oil and make your hair really shiny too.
Tip: If you cant stand to turn the shower onto ice cold water like me, then get out of the shower and turn on the water for the tub and flip your head over and rinse with cold water that way.
Do you have any tips you want to share on washing your hair? I would love to hear them Smile

6/22/2011

Review: John Frieda Full Repair Touch-Up Flyaway Tamer

This product is packaged just like a tube of mascara with the same type of wand and bristles. It’s a crystal clear formula with Inca Inchi oil (Inca Inchi oil is a plant originating from the Peruvian Amazon Region, known to be the best oil plant because of its composition and high nutritional quality and its  high content of the omega -3 acid). It’s intended to smooth away those little hairs that stick up and fly always. I bought this because after I tease my hair there are always some of those little pieces that won’t stay. You brush the wand lightly over broken hairs or fly always and I emphasize the word lightly because if not it can make your hair look a little on the oily side. I don’t recommend re applying right away. A little bit goes along way. On a scale of 1 to 10 I would give this product a 7 and here’s why:
Pros:
As far as packaging, it's the perfect size to fit into your purse
You don't need to use a lot of it so it will last a while
It does what it says its supposed to do
Cons:
They say to use it on fly aways but I wouldn't suggest that bc you would need to use too much of it for longer pieces of hair
It says re-apply as often as needed, that's not a good idea on the same piece of hair. Your hair will look greasy
Overall this is a pretty good product, I wouldn't say it was amazing but you can use it for those little broken hairs that stick up. You just have to be careful to not overdo it, remember it is an oil.
Suggested retail price: $9.99 at your local drugstores or at  http://www.johnfrieda.com 

6/19/2011

Review- e.l.f Shine Eraser Oil Blotting Sheets

I was at Target yesterday and picked up these Oil Blotting Sheets from e.l.f. I don’t know about you guys but just walking to my car from my house in this hot weather gives my face an oily and shiny look that I can't stand. Especially when I just finished putting on my makeup. From a scale of 1 to 10 I would give them a 8 and here’s why:

Pros:  

They were only a $1

They contain 50 of the shine eraser sheets in each package

They do absorb the oil and shine from your face for a good amount of time

On the front of the packaging there's a diagram that shows you where your T-Zone is

The sheets are made with Green Tea Extract (that helps re-texturize the skin)

They come in a small package so you can bring them everywhere

Cons:

They claim to also minimize your pores while re-texturizing your skin, masking facial imperfections

I didn't notice that my pores looked smaller or that they helped mask any facial imperfections.
Overall there basically just oil blotting sheets. I have yet to see that they  minimize my pores and hide imperfections I've used them twice and I was impressed how they instantly absorbed the oil from my face. If I didn't only spend a $1 on these I would be disappointed that they didn't do those extra things they claimed to. I'm happy with them and would buy them again.

Suggested Retail price: $1 at your local Target or you can find them on http://www.eyeslipsface.com 

6/16/2011

10 Great Beauty Tips

I want to share with you guys some really cool beauty tips and secrets. Each one of these tips I've tried myself and found them to be very useful. Some of them might sound a little wacky but trust me they work. I wouldn't give you guys any suggestions if I didn't personally use them myself. Please comment on any of the following you've tried or do try. xoxo
  • Glowing Skin Secret: Mix a quarter size worth of  your favorite self tanner with the same amount of your regular daytime moisturizer. The lotion will dilute the self tanner and give you just the right level of radiance.  You can also do this every few days to build up the shade you desire.
  • To Smooth Razor bumps and burns: Crush one asprin pill up and mix it with one cup of warm water and apply lightly with a washcloth OR you can dip a washcloth in milk then rinse off.
  • Eliminate Yellow Nails: To help nails that have become discolored from using dark nail colors or have turned yellow you can mix 2 tsp: of whitening toothpaste and 1 tsp: of lemon juice and mix them to form a paste. Apply to nails and leave it on for about 5 minutes, then rinse off.  The lemon removes the stains while the toothpaste will whiten and buff the nail beds.
  • Instant Hairstyle Change: For an instant style change try changing the part in your hair occasionally.
        • A deep side part gives you more of a glamorous look for a special occasion
        • Flipping your hair to the opposite side can give you added volume in the front
        • A center part and a little help from your flat iron can create a retro-sleek look
  • Re-use Your Mascara Brushes: Dont throw away your empty mascara when it's expired. Wash the brush thoroughly with makeup remover and use it to tame your eyebrows
  • An Easy Way To Draw Attention To Your Eyes: Without piling on a ton of eye makeup on you can easily draw attention to your eyes and make them sparkle by lightly combing petroleum jelly onto the tips of your eyelashes. (Only use a very small amount or it will have the opposite effect)
  • Shampoo Smart's If you feel like your going through twice as much shampoo as you are conditioner, it could be bc you don't properly wet your hair before rubbing  shampoo in your hair. Be sure to wet your hair for at least 30 seconds before applying shampoo. Application of shampoo to soaked hair will be much gentler and will also require less product to do the same.
  • DIY Hair Conditioner: This conditioner is great for dry hair and normal hair will also benefit from it too. Mix one mashed avocado with coconut milk until it becomes thick. Then comb through freshly washed hair, leave in for 15 minutes then rinse thoroughly.
  • A Cheap Way To Whiter Teeth: Drink a cup of hot water with lemon everyday and you'll notice your smile will be brighter
  • Hat Head? To give your hair a lift after taking off your hat, turn your head upside down and shake some air into it. Sprinkle some water onto your fingers and run them through your hair in an upward jagged motion. If you have styling products in your hair the water will reactive and give your hair a lift.

6/15/2011

A Quick Way To Wash Your Makeup Brushes

Since you probably aren't going to wash your brushes as often as you should (or probably ever, yuk). You can always grab a baby wipe or makeup remover wipe and do it that way. Just a few sweeps  over the wipe will work out the makeup and the oils that collect on the bristles  preventing you from getting fresh color on the brush and a good blended look. It's a ton easier and only takes a few minutes. Not to say you shouldnt take the time out once every few weeks to give them a deep cleaning. You don't want to ruin your good brushes or transfer the bacteria onto your face causing your skin to breakout.

6/14/2011

Five Favorites: May 2011

May’s favorites were hard for me to pick out. I went back and forth between a few products deciding which ones I liked more. They’re all inexpensive drug store products (got to love beauty bargains)! So I guess you can say May, for me was a good month for beauty finds.
     SauvĂ©'s Volumizing Root Boost Spray
My haircut is a lot of short layers on the top so I’m always looking for root boosting or volumizing hair products for when I blow dry my hair to give it some extra oomph. SauvĂ© recently came out with a new line of professional proven hair products that guarantee to work as well as salon products. I honestly wasn’t expecting much but I was wrong. I already have some volume naturally bc of my short layers but when using this product I definitely saw results. I spray my roots by parting 1 to 2 inch sections and then continue to mist evenly through my roots and the mid shaft of my hair. I also use a big round brush concentrating on the crown.
                         

Wet n Wild Color Icon 8 pan Eye shadow Palettes – in Comfort Zone 
When I think of Wet n Wild it brings back memories from when I first started experimenting with make up. I remember buying there $1 eyeliners and nail polishes. They weren’t the best quality but being a young teen it was what I could afford and honestly didn’t know too much about the difference in the quality of makeup. I never thought that I would be comparing their eye shadow to some of the most expensive brands of makeup, but I am and I'm so glad! Wet n Wild recently came out with a new 2011 line with a brand new assortment of eye shadow palettes and they are incredibly pigmented and rich in color. Not to mention how smooth they go on and how long the color lasts. I’m totally in love with all of them. I believe they have a total of 6 different palette’s in trios and 3 different 8-pan palettes. I’m going to show you one of my favs, its one of the 8 color sets. This one is called Comfort Zone and it has 2 brow bone, 2 eyelid, 2 crease, and 2 definer shades and their all labeled to give you the direction you need to create a gorgeous effect. I highly recommend these, if you haven’t tried them yet, well you really should. I know you’ll be impressed.


        Body Bling by Scott Barnes
So I'm not going to lie, I use to be somewhat of a tanaholic, tanning beds and laying out the sun whenever I could. I know it was horrible for my skin. As I’ve gotten older I’m more aware of how bad the sun is for you. I’ve tried so many different self-tanners, even tried the spray tan at the salons. I never was really impressed with any of them. They either made me look orange or had no effect or they were streaky. Then I found Body Bling by Scott Barnes, a celebrated make up artist within the cosmetic industry. He has worked with world-renowned photographers with his work gracing the covers of magazines such as Allure, Harper’s Bazaar, In Style, Vanity Fair and much more. Scott has also worked with a variety of celebrates such as: BeyoncĂ©, Kate Hudson, Gwyneth Patrol and more.  Body Bling is the only self tanner I will use. Its easy to use tube ensures a flawless application. You basically just apply it like you would a moisturizer, (of course rubbing it in more thoroughly) I've never experienced any streaks. . I have been using it on my legs when I wear capris and I love how it looks like you just got back from a tropical vacation. I use the original Body Bling that comes in a 1oz tube. It looks small but you only need a tiny bit and I’ve had mine for months.
           

Got2b Rocking It Dry Shampoo
I’ve always loved most of Got2b’s hair products. So when they recently came out with their dry shampoo I had to try it. Especially since I don’t wash my hair everyday, so on the 2nd (or sometimes 3rd day) this come in handy. You just shake it very well, spray it about 8 inches away from roots, rub it into scalp then brush it out. TIP: After applying the dry shampoo blow dry your roots with a round brush. The mix of the  dry shampoo and the natural oils will make for a great volumizer, so you'll  get an extra day out of your blow-out and major volume
      
e.l.f Eye shadow Brush 
When I say this is a favorite brush among the high end Big Name ones in my collection I'm not kidding! It's the same shape and does everything the MAC –239 brush does but in my opinion the bristles are softer. The store Target near me finally started selling a full line of e.l.f products. The first time I came across it I was so excited (especially bc the highest price item was $5)! So I went a little crazy and bought about 15 items. I couldn’t resist (being the beauty addict that I am). I was so surprised the first time I used this brush, it’s especially great for picking up pigments and even for the crease of the eye. The one negative thing I could say about this (and it really doesn’t matter to me since it was only a $1) but they don’t clean as well as my other brushes do. For some reason the eye shadow doesn’t come off as easy. I would still prefer this brush over some of the higher priced ones. Can we say BEAUTY BARGAIN!!!
        

Related Posts Plugin for WordPress, Blogger...