Showing posts with label sinful colors. Show all posts

5/03/2013

ABC Nail Challenge: Q is for Queen of Beauty

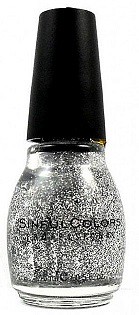
Hey Everyone! So we're already on the letter Q in the ABC Nail Challenge I've been participating in. I can't believe we only have 9 weeks (letters) left of this challenge, I don't want it to end! Anyway for this week I used Queen of Beauty by Sinful Colors.

sinful colors

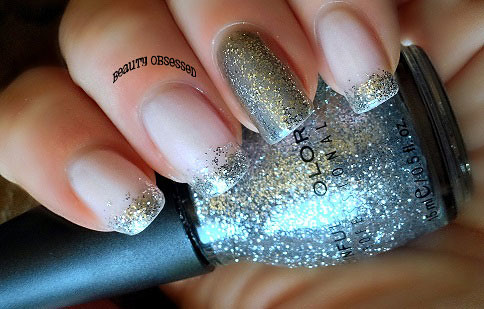
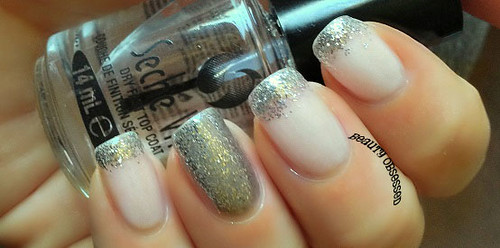
I knew the letter Q was going to be a challenge, at least for me anyway. I don't know of any nail art associated with Q and I'm not that creative too come up with something else. So I looked through my collection and found only one color that began with Q. Queen of Beauty  is a silver glitter topcoat. I call it a topcoat because the glitter is pretty sparse but you can use it alone like I did on my accent nail, it just takes a few coats.
glitter nail art

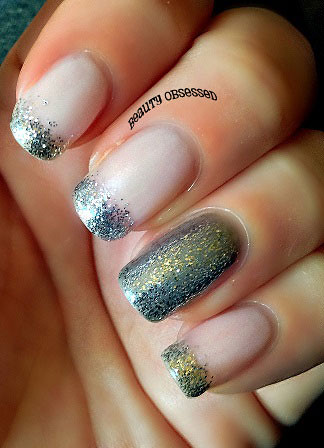
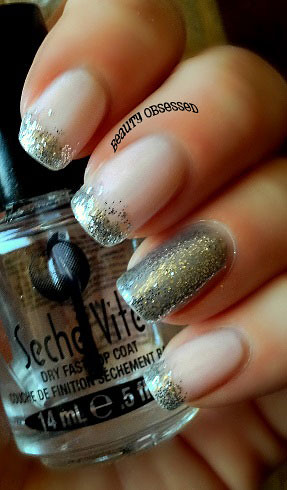
I thought this color would look nice with a really pale pink so I used one of those pinks that come in a french manicure set. Normally you would only use one coat if you were going for the traditional french mani but I used 3 to make it more opaque. Then I used NYC Matte Me Crazy over the pink, I thought the matte finish might give a nice contrast since the glitter is so shiny. I know it's hard to see in the pictures.
nail art

As you can see I used Queen of Beauty on the tips except for my accent nail, that is 3 coats of just Queen of Beauty.  Instead of using the brush from the bottle I used a flat nail art brush and I think it helped in spreading the glitter evenly. You guys know how this kind of glitter is hard to work with sometimes.  
glitter nail art

nail art

Unfortunately this mani only lasted 4 hours because the pink polish started to chip and dent. That's the one thing I don't like about using matte top coats, they don't last as long. They need to come out with a matte no-chip top coat, that would be genius! I'm going to go check out what everyone else did this week :)


Click the links below :)

4/26/2013

ABC Nail Challenge: P is for Polka Dots!

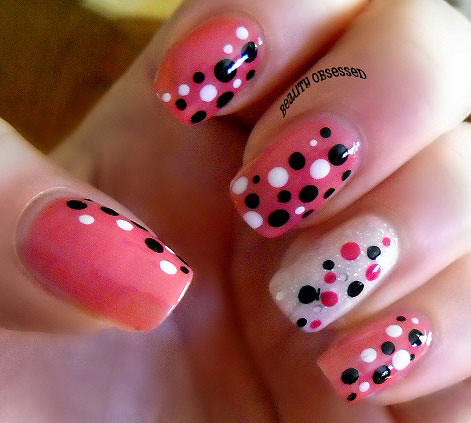
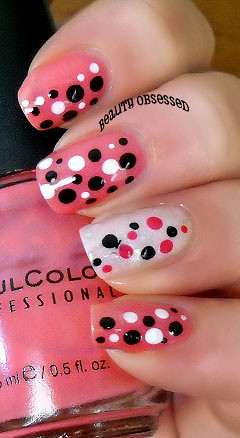
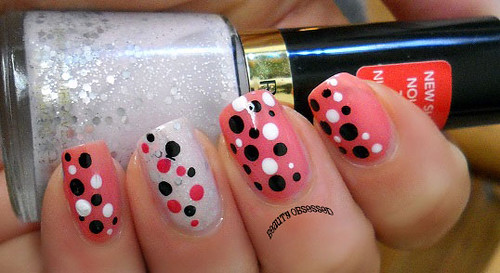
This week for the ABC Nail Challenge I choose polka dots for the letter P. I know, it's not too original but there are so many different looks you can create with a few dotting tools.

polka dot nail art

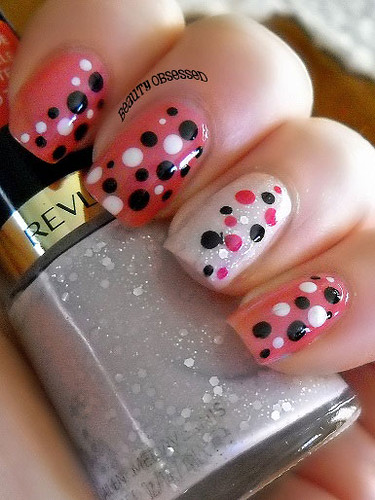
Going along with the "P" theme I used Scandal  by Sinful Colors (one of my favorite pinks) and Popular by Revlon on my accent nail. You can't really tell in the picture but Popular has both silver micro and hex glitter which makes this such a pretty color. I know a lot of other beauty bloggers love it too.

polka-dot-4

I didn't have a set look I wanted to achieve so I just began dotting small and large dots on the sides of my nails. I didn't want to do the usual straight dots across, I wanted something a little different.

polka-dot-2

polka-dot-5

I haven't done a polka dot mani in a long time so it was fun and I like how they turned out. What are your thoughts on polka dot nails, do you like them or no?

Click the links below :)

4/17/2013

ABC Nail Challenge: O is for Ombre

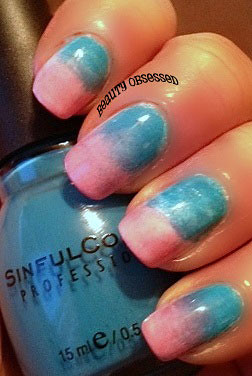
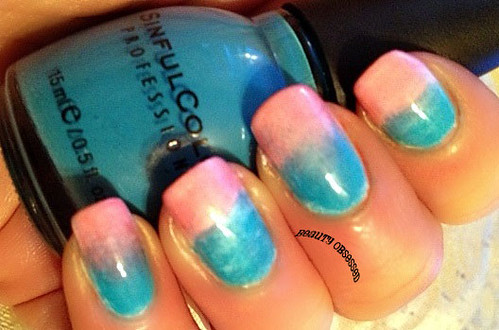
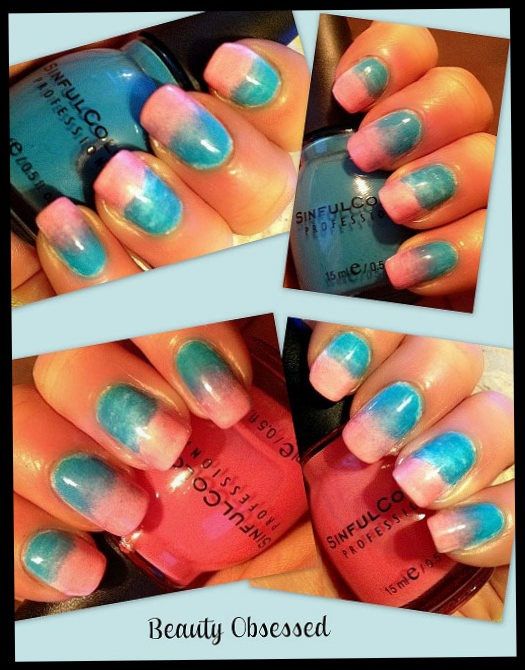
Hey everyone! We're on the letter O in the ABC Nail Challenge this week, (already)!  This week has been a crazy one for me, so much that I knew I wouldn't have time to do my nails or at least with the effort I would want. I remembered an ombre manicure I did recently and figured I would post those pictures instead of skipping out totally this week.

ombre nail art

Savage and Scandal by Sinful Colors are such pretty colors alone and I really like how they look together. The more I look at these pictures they remind me of the summer, the beach and cotton candy!

gradient nail art

ombre nail art

This was my first go at ombre nail art so I played it safe with two colors but I want to try it again soon with three or four. It's a fun look and easy to do even though it was more of last years trend, I don't care. I'm looking forward to next week and coming up with something fun for the letter P. You should definitely check out the looks from the other participants in this challenge :)

Click the links below :)

3/28/2013

ABC Nail Challenge: L is for Leopard

This week we're on the letter L for the ABC Nail Challenge hosted by Kimber over at
Kimber's Lacquer Korner. If you like nail polish and nail art you should really check her out then, she has a lot of amazing looks!

Anyway, this week was a lot easier on me than last week's Hello Kitty disaster! There were more choices this week. I had a few polishes that began with L but none that I was crazy about using, so I chose a leopard print mani. Leopard print is always fun and besides it's been a while since I did one.


Instead of the traditional golden leopard colors I picked a brighter combo, blue and silver. I used Celeb City by Sally Hansens Xtreme Wear and Savage by Sinful Colors. They look a bit sloppy up close but they're not supposed to be perfect so it's okay. I always used a dotting tool for the nail art in the past but I found that using a thin nail art brush helped to speed the process along.


You should also check out the other participants looks this week, they always come up with really cool ideas!


 Click the links below :)

3/13/2013

ABC Nail Challenge: J is for Jelly Sandwich

This week we're on the letter J in the ABC Nail Challenge hosted by Kimber at Kimber's Lacquer Korner. She is amazing at nail art so if you want to see some real inspiration check her out!  I decided to do a Jelly Sandwich manicure, I haven't done one in a while and I'm in a glittery kind of mood today.


For the base and top color I used Splash by Pure Ice and for the glitter I used Nail Junkie by Sinful Colors. Splash is a frosty pale blue shimmer that needs 3 coats for full opacity. Nail Junkie is a sheer teal jelly filled with flecks of silver, blue and green glitter. It's a little thick and gloppy but not too hard to apply, especially if you're just layering it, but still one of my favs from Sinful Colors.

I almost didn't want to apply the third layer (of Splash) because I loved the way Nail Junkie looked over Splash alone, but this is a Jelly Sandwich so I added it and liked it. I'm sure I'm not going to like removing this but thank god for the foil method!!


I wish my camera was able to capture better pictures of my nails, especially when I'm wearing glitter because you can't see the exact color/effect of what I see. 

I don't know what made me think of this but instead of using my regular top coat I used my Matte-ly In Love by Hard Candy. I guess I was also in a Matte mood too :) I love glossy nails but I also really like the look of matte finished glitters. It totally changes the look of your manicure. You can't really tell in the pictures but it makes the glitters individually pop.  


I'm going to check out what all the other ladies have done this week, make sure to check them out too :)


Click the links below :)

Photobucket

3/09/2013

Acid Wash Nails! Tutorial

Hey Everyone! I wanted to try Acid Washed nails for the first time. I've seen this look before and liked it but totally forgot about it until now. I like how it came out and its super easy!  As I was doing them I decided to do a step by step tutorial with picutres, and then I decided to record the last step since it's easier to show you then put into words. Here's how my nails came out, for the colors I used: Midnight Blue by Sinful Colors and French White by Wet n Wild.


acidwashnailart.jpg


Here is a little step by step tutorial with a short video to help you with the 3rd step. 


What you will need:
- Blue nail polish
- White nail polish
- Nail Polish Remover (preferably acetone)
- A bunch of Q-Tips
- Top Coat

  
Apply 2 coats of a blue polish then a top coat. Let them fully dry.


Once the blue polish is dry, apply a coat of white polish directly over the blue and again let fully dry!


**Watch the quick video I made below to see exactly how I do this**

Saturate a Q-tip in nail polish remover and start to rub the nail in a downwards motion using light pressure. Then add some top coat and your done!
  

Quick Video on How to get the Acid Wash Affect!


TIPS & TRICKS:
  • You will probably need 2 Q-Tips a nail since your picking up a lot of white polish
  • Make sure the Q-Tip is saturated in the nail polish remover. This will help it go by faster.  
  • Don't rub too much in one spot because you don't want to pick up too much of the blue polish.
  • Use light pressure when using the Q-Tip, or you can end up with a bumpy nail like I did.
  • Be patient with this manicure, let the blue polish and white polish dry completely.
  • Be careful that your Q-Tip doesn't get bits of cotton on your nails, that's why it's best to use a few Q-Tips each nail. 
  • If your nails still feel tacky because of the 3 coats of nail polish, dip them in ice cold water before you go in with the Q-Tip. That should take any stickiness away.
  • You don't have to use the standard blue and white colors, you can be creative and use any colors you want!


I hope you liked this tutorial! I had fun making it!  Let me know what you think :)


Click the links below :)
Photobucket

2/18/2013

Blue & Pink Ombre Nails!

I know the whole Ombre trend was last year but I decided to try them out on my nails (I know I'm behind the times lol). I'm actually surprised that this was my first time since I love trying new nail art trends.

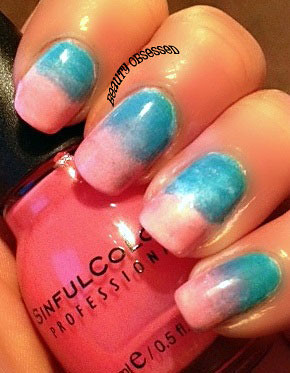
But anyway, I just wanted to do a quick post showing you how they came out. I didn't pick the usual lighter to darker colors within the same shade. I used Scandal and Savage by Sinful Colors because I think they look gorgeous together.


If anything the color combo reminds me of spring/summer or a bright sunny day. A few of the nails didn't blend together as well as I would have liked but its okay.

This was one of the easiest nail art looks I've done. I applied 2 coats of white polish as my base. I cut one of those white makeup sponges in half and used the flat side to paint one half blue and the other pink. Then I just aligned the sponge up with my nail and kept dabbing onto my nails and then repeated the process of painting the sponge and dabbing. So I did two coats using the sponge. (If that made any sense). Adding a coat of Seche Vite makes such a difference, before they looked a little splotchy but the topcoat made them look nice and shiny!!!

What do you think of my blue and pink ombre nails?


Click the links below :)

Photobucket

4/15/2012

A Year's Challenge Week 16: Dotticure Mani

Dotticure?? Hmm..I'm guessing that this is just a fancy word for a polka dot or dotted mani. That's the way i interpreted anyway. I love learning all these new names for manicures I never heard of.

I knew I wanted to come up with something creative, even though Im not usually that creative. So I got out my set of dotting tools and basically just started dotting away. I noticed that when i don't think about it too much ahead of time, I have a lot easier time deciding what Im gonna do. That's how I came up with my dotticure mani.

2/21/2012

A Year's Challenge Week 8: Corset Mani

This week's manicure for the Nail Challenge was a little intimidating. I'm usually not too bad when it comes to freehand nail art but it depends on what it is.  When it comes to using my non dominant hand, forget about it. I don't know how people do it! I actually forgot what a corset really looked like so I had to google them lol. Then I remembered, it's actually a good idea for a manicure.

1/03/2012

NOTD: Silver and Matte French Manicure

This is gonna be a quick NOTD post because I'm still not sure if I like it yet. I was inspired from a look that Kim Kardashian did back in August of 2009, it was a black on black mani with a matte and glossy finish. I love the contrast between the base and the french tips, so when I saw this I knew I had to try it. Here's the pic of Kim's nails:


12/12/2011

MY FAV NAIL COLORS OF THE SEASON + SWATCHES

This post is going to feature some of my favorite nail colors I've collected this season along with swatches. If you read my blog you might know that I'm really into nail polish, I always have been but my obsession has gotten worse over the year.  I used a nail wheel to swatch each color so you can hopefully see what it looks like outside of the bottle. As you can see I marked each color with a number right above and that corresponds to the descriptions below. I wanted to narrow it down to just 10 colors but I couldn't do it, narrowing it down to 13 was even hard. I hope you enjoy this post :)


11/15/2011

NOTD: CHECK IT OUT!


So this nail look of the week was created around Sally Hansen's nail polish strips in check it out. As you can see there not your traditional checkered look but they still look like checkers. I've had these strips for a while and wanted to use them but I don't like applying them to all my nails. I feel like it takes too long and besides I like painting my nails but there fun to use on a few nails here and there.

11/07/2011

NOTD: SPARKLE + BLACK = GORGEOUS!

I usually only paint my nails once a week, I feel like if I was to paint them more than that it wouldn't be good for my nails,  but if you saw my last NOTW post with the Snow Me White and Rock Star Pink glitter added you know that I was not happy with the results at all. So I made an exception and took it off today and tried something different. 


11/03/2011

NOTD: SNOW ME WHITE & ROCK STAR PINK

I had the urge to paint my nails white for some reason but I didn't have a good white polish in my collection. So I went to Twitter to find out which brands made a good white nail polish. You know how white needs to be applied very evenly or it will look messy, well someone said that Sinful Colors made a nice one and I do love that brand. I went to my local Walgreen's and found Snow me White for only a $1.99.

I was very pleased with how nice and even it came out. I needed to use 3 coats to give it that bright opaque finish I wanted.

I bought this really pretty glitter polish called Rock Star Pink by Sally Hansen's Xtreme Wear a few weeks ago but haven't had the chance to try it yet. So I layered it on top of the Snow me White.

10/19/2011

NOTD: OUT OF THIS WORLD


Out Of This World by Sinful Colors

When deciding on what color I wanted to use this week, I really didn’t know. All I knew was I wanted to do something different this time. You guys know how I love playing around with different desings and looks.


I found Out of this World by Sinful Colors in my collection and practically had to dust it off. I couldn’t even tell you when I bought it but it had to be a long time ago. Anyway, its your normal silver polish with some shimmer, It reminds me of tin foil lol. What you see in the picture is 3 coats. I hardley ever apply 3 coats (I’d rather apply 1 all the time if I could get away with it). But I wanted a bold look, not a sheer one. Let me tell you one thing though, it took forever to dry! Even after a half hour I smudged a nail.

NO FLASH

10/15/2011

I WON A GREAT GIVEAWAY by BEAUTY IN NYC!!!


I WON BEAUTY IN NEW YORK CITY's GIVEAWAY!!!
                 

Kristen from Beauty in New York City celebrated her birthday on August 10th and had a HUGE Birthday Giveaway. When I say HUGE i mean really huge!! I remember entering this giveaway and thinking to myself "how cool would it be if I actually won"? I usually have horrible luck so when she emailed me to tell me I was the winner I was pleasently shocked!

The products that Kristen  gave away were extremely generous and you'll see why once you keep reading....

Related Posts Plugin for WordPress, Blogger...